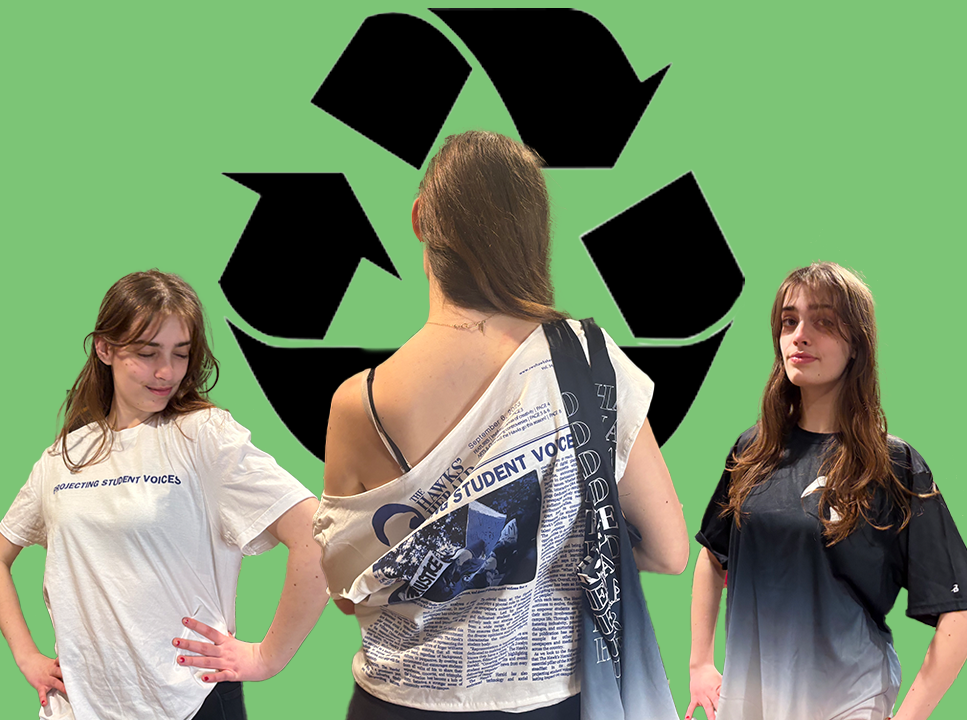
Every year, the fashion industry accounts for 92 million tons of waste, with this number expected to rise to 134 million by the end of the decade. According to Earth.org, the cause of this is likely fast fashion, which is currently producing double the amount of clothes produced in 2000.
While all these big numbers can seem scary and overwhelming, it is important to remember that you can make changes in your own life that will help these numbers go down. Some easy methods are buying fewer clothes, wearing clothing items multiple times, and being selective about what brands you buy from.
But what if you have some old item of clothing that you don’t want anymore, should you just throw it away? No! In this guide, I will teach you 4 easy ways to upcycle an old t-shirt, turning it from something you would never wear to a closet staple.
Boat Neck top

1. Cut neckline/ sleeves
Pro tip: Draw your lines on the inside of the shirt before you cut. For a symmetrical neckline, folding the shirt in half is essential.
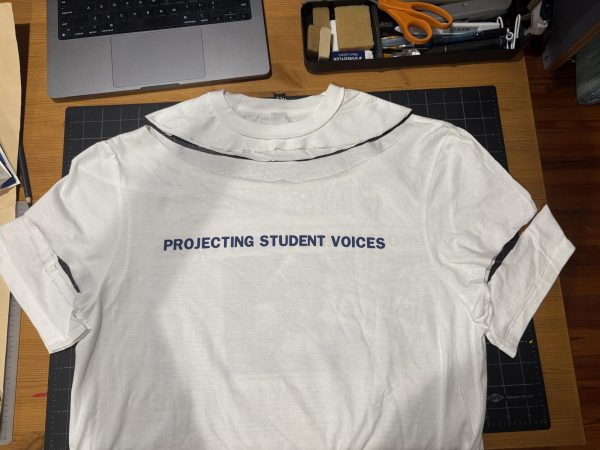
2. Trim bottom
This part is up to your preference. How long do you want your shirt to be? The shirts I was using were long, so I ended up cutting off nearly half.
3. Hem or Glue
Fold over any raw/unsewn edges, then sew them in place, or glue them if that would be easier for you. Make sure the raw edge isn’t visible from the outside or good side, this will give you a more professional look.
Over the Shoulder

I forgot to take photos for this design, so enjoy some drawings instead.
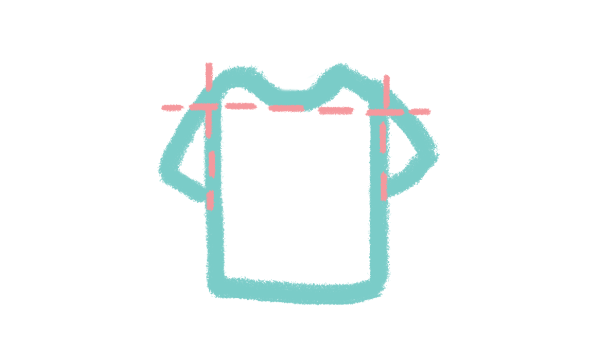
1. Cut neckline/ sleeves
Cut according to the drawing below.
2. Cut off the bottom
For this shirt, you will have to be careful about how much of the bottom you cut off since it will become your sleeves. If you want to be super careful, you can measure it, but I just ended up eyeballing it.
3. Take it in
Now that you have cut off the bottom time to cut off the sides, yeah, this might be the hardest one on this list. This step is all about making the t-shirt fit you right, so make sure to put it on yourself and mark how much you need to take in. Once you’ve done that, make sure the shirt is turned inside out and sew on your mark. Try it on, and if it doesn’t fit, take the stitches out and try again. If it does fit, cut off the excess fabric and donate it to your friend who likes crochet and needs some filling.
4. Sew on Bottom
This part is hard to explain and can get confusing, I messed it up the first two times. Take the raw edge of the bottom of the shirt you cut off and flip it so the inside is out.
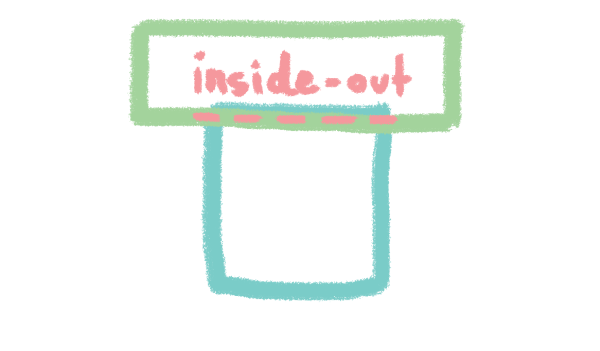
Fold over the raw edge of the top. The shirt should be right-side out. Then, lay the other piece on top of it so the raw edges touch. Now sew them together, being careful not to sew the shirt shut. Fold over the attached part and bam, you have your top!
5. Hem or Glue
You only need to sew up that bottom edge, but you could also clean up the sleeves if you want to be extra.
Sports Crop Top

1. Cut off neckline/Sleeves
I messed up here! Don’t cut your strap that thin.
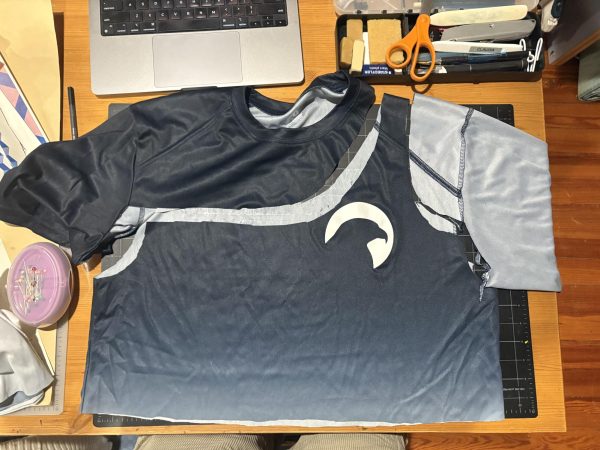
2. Cut of Bottom
Since this shirt is purposefully cropped, I grabbed a crop top I liked and used that as a reference. You could also do the same with a sports bra.
3. Take it in
4. Hem or Glue
Big Bag!

1. Fold in Half
Make sure the neckline lines up exactly. Pin it in place if you have to.
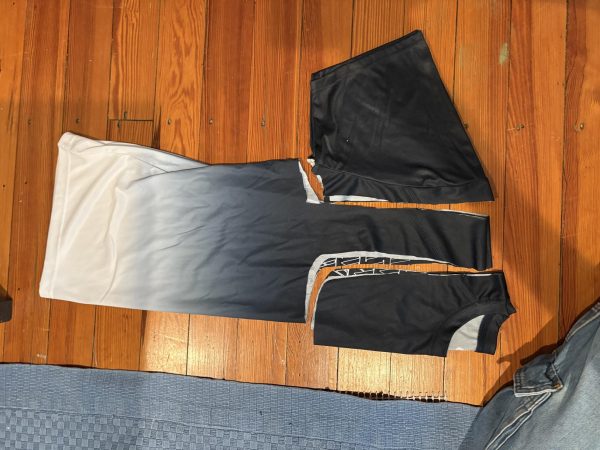
2. Cut off Neckline/Sleeves
3. Sew Bottom
Turn the shirt inside out. Sew straight across the bottom. Flip back around.
4. Hem
Optional: Add Pocket
Cut out a square of fabric to your desired size and then pin it onto the front of your bag. Sew three of the four edges to the fabric, making sure not to sew them into the other side of the bag.
Did you do any of these alterations? Or maybe even all of them? Post them on Instagram or TikTok and tag @thehawksherald! Good luck on your upcycling journey!

